
Balaclavas have become really popular lately, and we love the trend. It’s a comfy and snug hood that’ll keep you warm all winter long. And although most shops offer their own version of a balaclava, it is super easy to knit your own – making it the perfect beginner project. In this blog post, we will walk you through how to knit a balaclava, the main tools and techniques you’ll need and give you some inspiration on 3 balaclava knitting patterns that are both fun and trendy. All of these patterns can be found in Knit&Note’s pattern library!
Be sure to check out our new webshop for everything you’ll need in your new knitting project!
What is a balaclava and how do you use it?
A balaclava is an accessory that is designed to cover your head and neck, while having an opening for the face – kind of like a hood. Although the accessory has been around for a long time, it has just recently become very popular again. Because they cover more of your face and head than a hat usually would, they are very warm and insulating for the winter. The balaclava also covers your neck, which means that you can leave your scarf at home – it’s like two accessories in one. A lot of balaclava or ski masks are typically used in winter sports, but we love the trendy take on the new fashionable ones.
How to knit a balaclava
Knitting a balaclava is definitely not difficult, and you only need a couple of simple techniques to knit a balaclava. That’s why it’s a great project for beginners, but also a quick and easy one for more experienced knitters. A quick project like this is motivating as it’ll be off your needles and in your accessory rotation before you know it.
It is so important for us that everyone gets to experience the feeling of accomplishment after making your very own piece of clothing. Although it may seem challenging at first, everyone can learn – and this is a great project for you as a beginner because it does not require complex techniques and it is quickly done.
Balaclava knitting patterns
These are our current favorite balaclava knitting patterns, get inspired and knit one yourself.
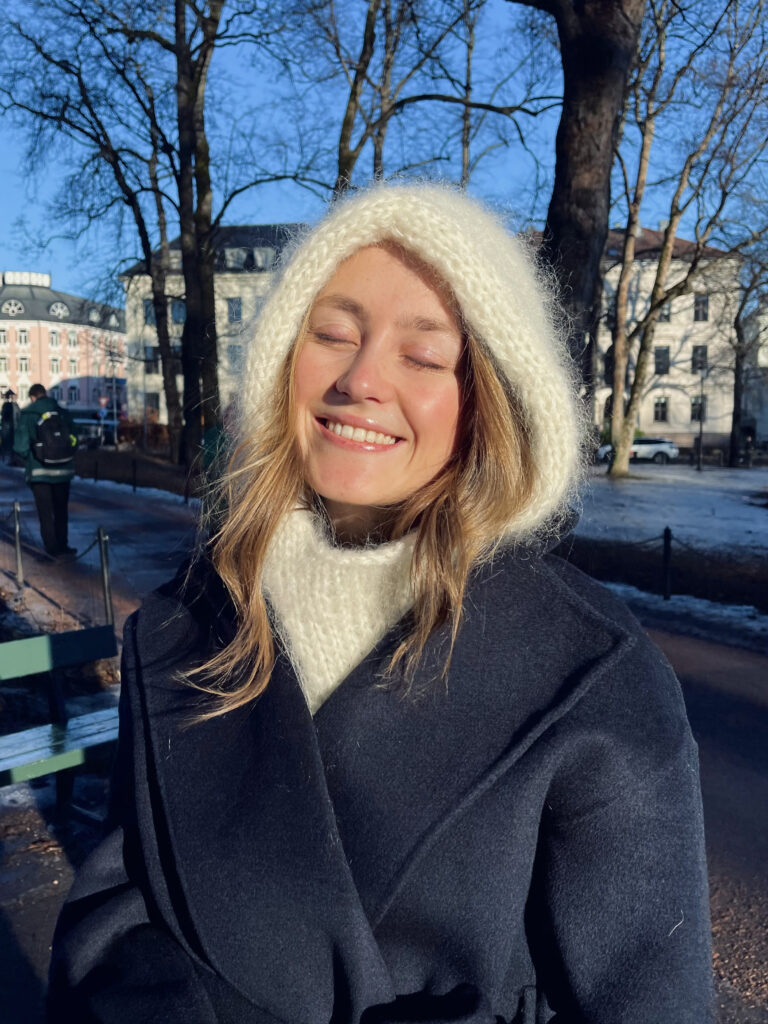
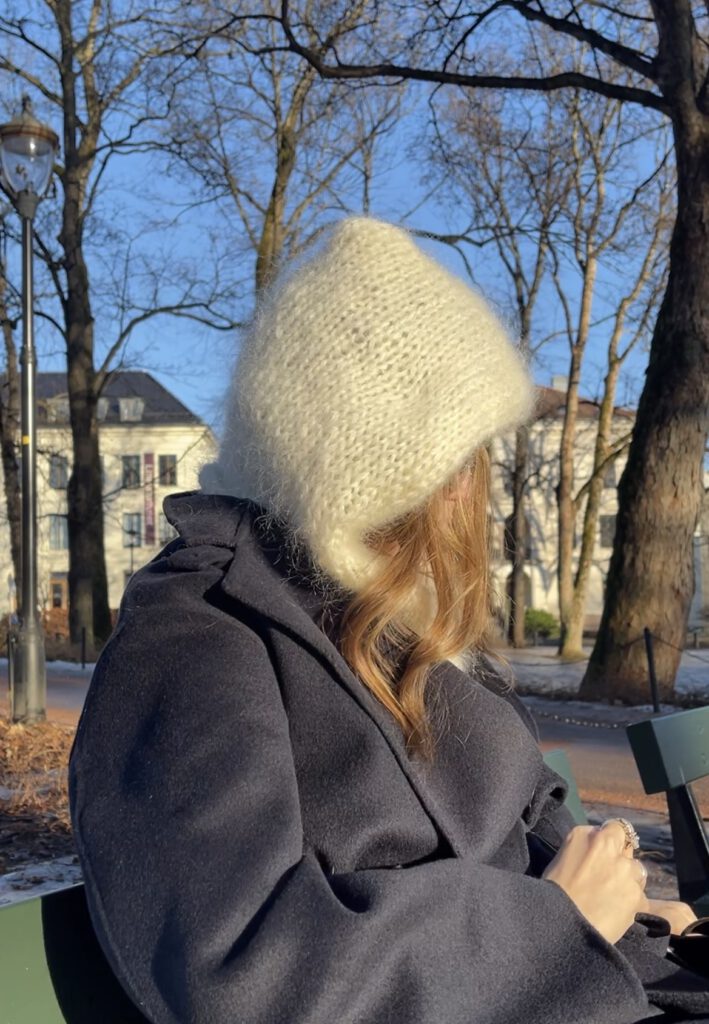
Fluffy balaclava
Klin Coco’s balaclava is so soft and fluffy and will definitely keep you warm this winter. The balaclava is knitted in two strands of mohair/alpaca yarn. The pattern includes steps for both one dense (white) version and a less dense version. Fluffy balaclava is a great beginner friendly pattern that you can easily knit in a week because of its large needle size and yarn weight. This comfortable accessory is perfect for those cold winter months, and serves as a great hat/hoodie for keeping you warm.
Suggested yarn: Påfugl Dale or Bella by Permin
Yarn weight: Bulky / Chunky
Needle size: 10 mm, US 15
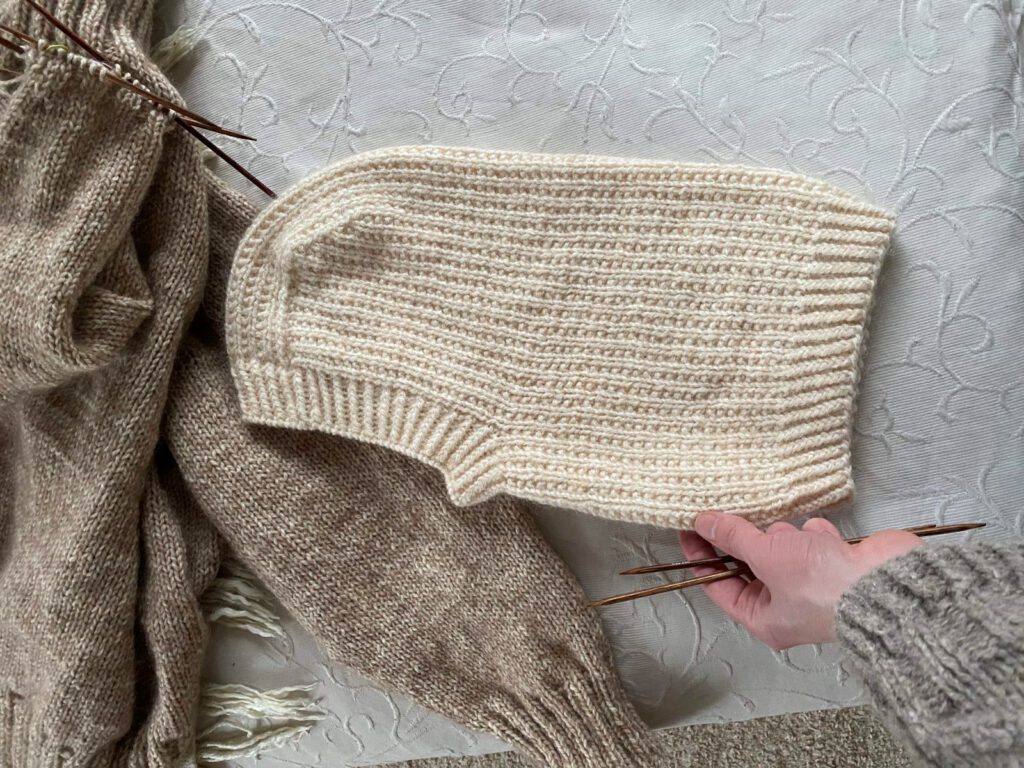
I knit balaclava
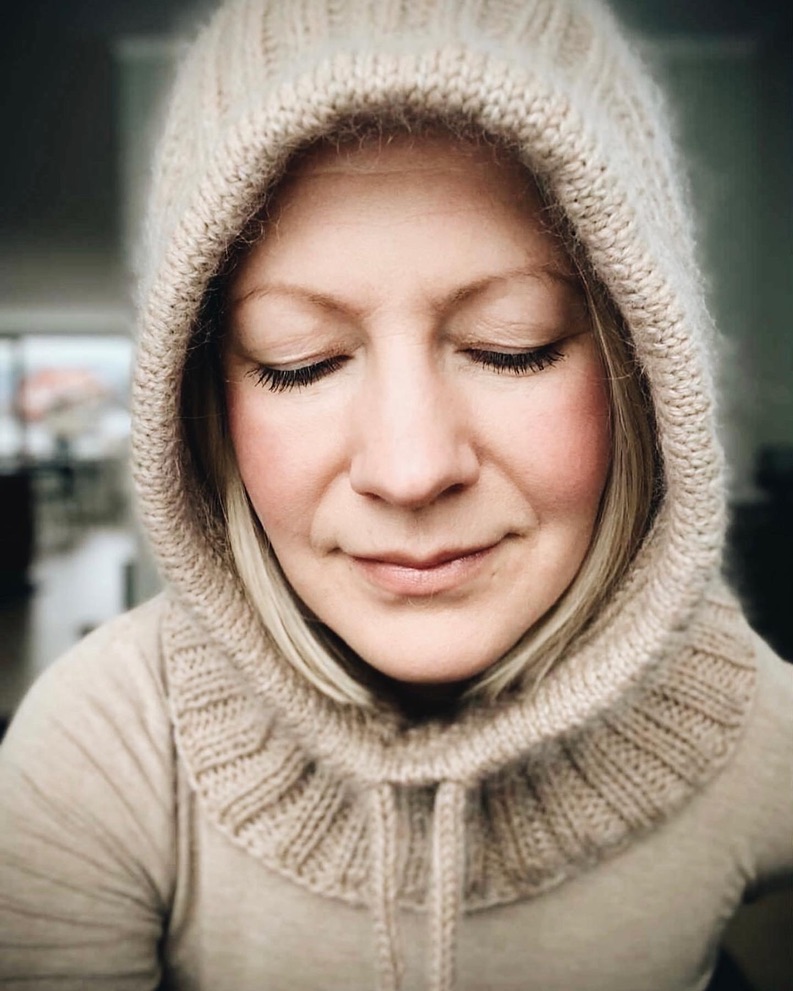
I knit balaclava is a knitted accessory that perfectly combines a hat and a scarf into one piece. It is a short, fun and quick project that is knitted bottom-up and can easily be finished over a weekend. This balaclava is knitted in a pearl rib stitch pattern, which makes it a bit more unique to your average stockinette stitch. This balaclava is a warm and cozy accessory suited to wear for the winter season, without even needing a scarf!
Suggested yarn: 3 strands held together: Ruke knit wool x2, Gepard, Kid seta
Yarn weight: Worsted / Afghan / Aran
Needle size: 4 mm, US 6
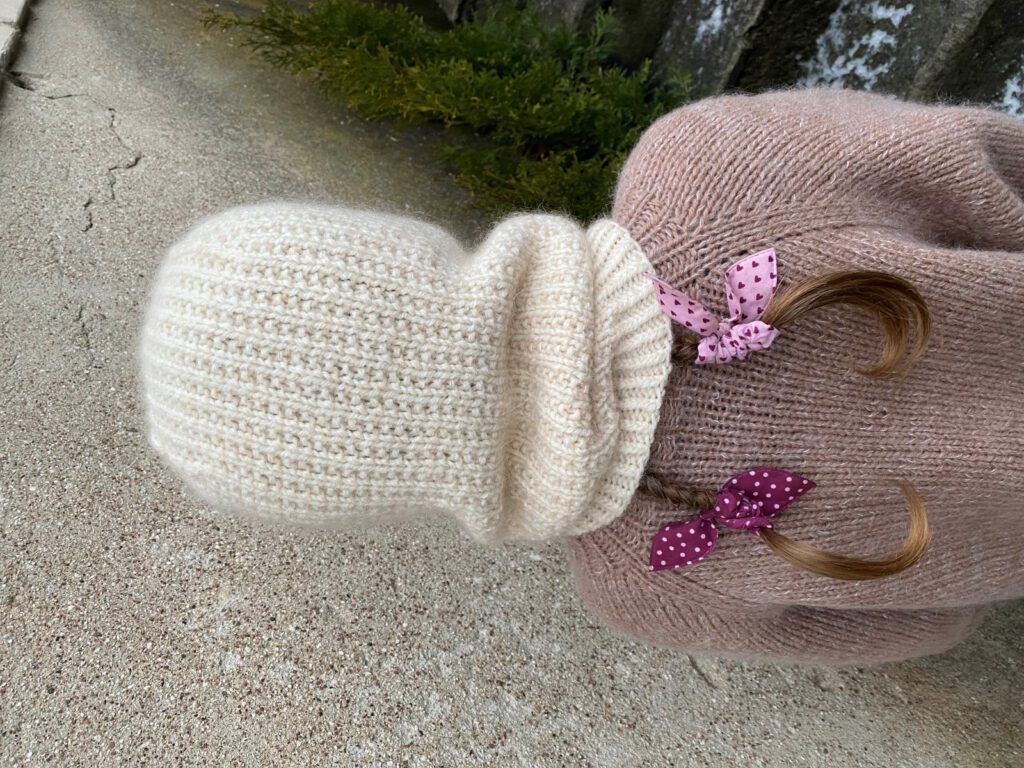
Wild hoodie
This hoodie, or balaclava with drawstrings, is knitted from the top down in double rib. The rib makes it more exciting but also more elastic, so it’s easy to pull it over the top of your head. The pattern starts by knitting a square which is the top of your head. Next, stitches are picked up along both sides of this square, and the hoodie is then knitted straight down in double rib. Finally, it gathers under the chin and knitted in the round. If you want to you can also knit a larger neckline, so it covers even more of your shoulder area, this is great if you get really cold winters. The drawstrings also add a unique touch, while giving you an option to tighten the hood.
Suggested yarn: Peruvian held together with Tilia from Filcolana
Yarn weight: Aran + Lace = Aran
Needle size: 6 mm & 4 mm, US 10 & US 6

Knitting techniques for knitting a balaclava
This, of course, depends on the pattern you will be knitting but a lot of the same techniques are used. They are also not advanced techniques and can easily be learned by anyone. Check out the technique videos in the Knit&Note app if you are unfamiliar with them.
Casting on: This is the most basic technique which is needed to start your knitting. It creates a row of loops, which work as stitches, on your needle making the next row ready to knit.
Bind off: This is a technique needed to finish off your work, and can also be known as cast off. This is needed to secure a finished project so it does not unravel and is simply done by passing the second stitch on your right needle over the first one.
Knit stitch: This is the most basic knitting technique and most likely the first one you will learn as a beginner. It is commonly used and looks like the letter “V” on your needles.
Purl stitch: You can view the purl stitch as the opposite of a knit stitch, it is often the second technique beginners learn. They look like little bumps on your needles. It can look confusing at first glance, but as soon as you get a hang of it, it’s like second nature. Purl stitches are most commonly used when knitting a rib by alternating knit and purl stitches. Purl stitches are also used to accomplish a stockinette pattern when knitting back and forth, where one row is knit and one row is purl.
Knitting in the round: Knitting in the round is a technique commonly used for making sweaters and hats. By using circular needles to create a tubular project, you eliminate the need to alternate between knit and purl rows. Instead, you simply knit continuously in a spiral, using only knit stitches.
Simple seaming: In some patterns you need to know how to sew/knit the pieces together. Here a mattress stitch is often used to create a seamless finish. Check out the video tutorial on how to do this in the Knit&Note-app.
Picking up stitches: This technique involves grabbing stitches and knitting them onto your knitting needle.
What supplies do I need to knit a balaclava:
You do not need many supplies in order to knit a balaclava, which is great when you’re just getting started and don’t have a large stash at home. On the other hand, if you do have a large stash, you will definitely find what you need laying around – it makes for a great scrap yarn project! That way you won’t even need to buy any new yarn or materials, making it a fun and cheap weekend project.
Knitting needles: You will need a set of Double Pointed Needles (DPNs) or circular needles. In some patterns you may need two different sized needles, whereas in others you only need one needle size. This usually because ribbing at the bottom of projects often require a smaller needle size, to give a tighter yet more elastic look.
Yarn: The yarn type and weight you need often depends on the project and pattern you choose to knit, whether you’re knitting in solely mohair, mohair held together with something else or a completely different yarn.
Other tools: Scissors, Stitch markers, Tapestry needle.
Suggested yarn
The suggested yarn mainly depends on the pattern you choose and the desired look you want. We have provided yarn suggestions under each pattern above, so you can always use that. If not, it’s important to remember that this accessory is right next to and around your face, so it’s nice to choose a yarn fiber that is not scratchy and will keep you warm. We love the look that mohair and alpaca give a balaclava!
Shedding
Although mohair is such a pretty and soft yarn, it is known to shed quite a lot. Try using these tips to avoid finding mohair everywhere:
Freeze your balaclava: Place it in a plastic bag and freeze your balaclava for a couple of hours, then give it a good shake. The fibers stiffen and therefore stay more in place after doing so.
Block: Make sure you block your balaclava when you’ve finished knitting it. After washing a lot of the hairs should naturally fall out, this also helps even out the finished product. Remember to place it flat while drying.
Lint roller: This one is self-explanatory!
Tips for when knitting a balaclava
Choose a pattern that you like and that suits your skill level: Luckily the pattern designer usually indicates the skill level required to knit their patterns. In this article, the Fluffy balaclava is great for brand new knitters, while the other two are better for experienced beginners/intermediate. It’s important to choose a pattern that matches your skill level so that you aren’t surprised and get frustrated halfway through the project because you’re unfamiliar with most techniques.
Measure and try on throughout the process: Balaclavas for adults are known to be a bit oversized, which is definitely more forgiving. This makes balaclavas a good beginner project because the gauge is not crucial, as beginners tend to struggle with even tension. That being said, it is still nice to be somewhat on the right path. In that case it can be a good idea to measure and try on your accessory throughout the process, this can be done whether its knitted top-down or bottom-up.
Gauge and swatch: Check your gauge so you know that you’ve got the right gauge, it is also always a great idea to knit a swatch – even though this may not always be tempting.
Knitting your own balaclava is not only a practical project for keeping warm but also a fun way of starting to knit or an easy project for well versed knitters. With the simple techniques and patterns we’ve shared, you can create a cool and stylish accessory that is perfect for the winter months. Whether you’re a complete beginner or an experienced knitter looking for a quick project, the satisfaction of knitting your own balaclava is so fun. Check out these patterns and many more in Knit&Note’s pattern library, experiment with different yarns, and enjoy the process. Happy knitting!

")